
The Great Things You Can Do With Git
Managing a project’s source code, be it a solo project or a large-scale one maintained by a team, is an important aspect when it comes to talking about software engineering. It is the very heart of an open-source system, and it is what gives programmers peace of mind when it comes to changing the code in potentially fatal ways. The system used to manage the source code and all the changes made into it is called version control. One such popular version control system to be explained in depth is called Git.
What is Git?
Git is a version control system created by Linus Torvalds, the same guy who created Linux. Git was created to be used with Linux development, as the system used before (BitKeeper) ended up having its own internal problems. While desktop applications and IDE plugins exist to make it easier to use Git with your project, Git was initially intended to be used with a command line or terminal.
For the purpose of this article, we will be assuming that GitHub will be used as the repository hosting service, and that you have already created a project using it on the website itself.
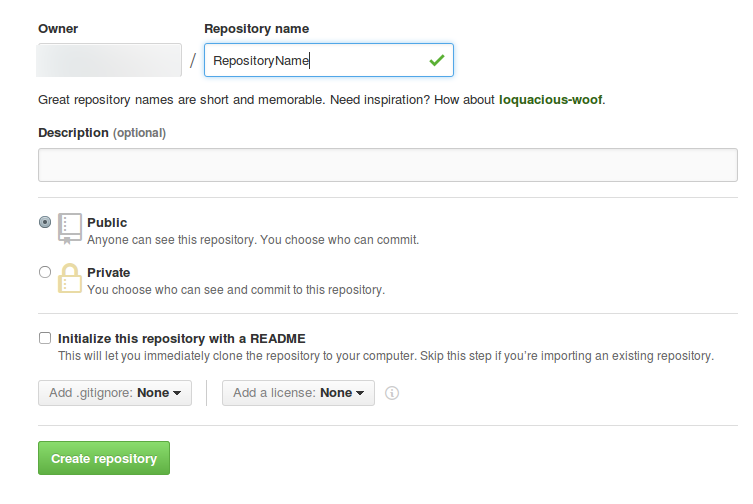
GitHub provides a simple interface for creating new projects
Starting a Git repository
To initialize an empty local repository, you need to type
git init
If you already have files in your GitHub repository, then you would first have to set the remote origin of your local repository. This means that you’re telling your local repository where to get all your code from—the GitHub repository. Setting the remote is as simple as
git remote add http://github.com/<username>/<project>.git
Afterwards, you would have to “download” the files from the remote into your local repository. Pulling from a certain origin/branch means that you’re getting your source code from that location in the online repository.
git pull origin master
Alternatively, if your project already exists on GitHub (with source), you can skip initializing an empty local one and instead clone your repository
git clone http://github.com/<username>/<project>.git
Making changes to the files
Now that your code is in your local repository, you can now freely make changes to the files inside of it. If you want to update the changes you made to a file or to a bunch of files, then you would have to create what is called a commit. A commit keeps track of what changes (such as insertion or delete) were made to which files. The word “commit” in this case can be used interchangeably as a verb or as a noun.
First, you would have to add all the files you want to include in the commit
git add <file>
To add all files with changes in them, you can instead type
git add .
If you have deleted some files and you want to keep track of the deletion, you can type
git add --all <deleted file>
Afterwards, you would have to make the commit. Each commit requires its own commit message, which is basically a short description of what changes were made.
git commit
This would open a predefined text editor (default one is vim) where you can type your commit message in. It would also show you which files were added, removed, or changed. Note that empty commit messages are not allowed. If you want to skip having to open a text editor, you can specify the commit message immediately
git commit -m "commit message"
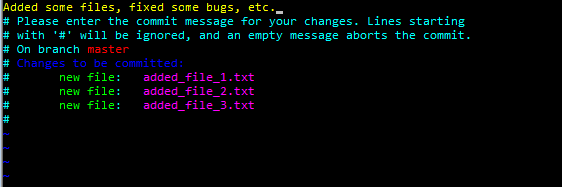
A Git commit message being created using vim. As a general rule, commit messages should be short yet descriptive
Updating the online repository
Now that you have organized your changes into properly described commits, you can now push those changes into the online repository. Pushing your commits tells the repository that changes have been made to the source code, and that the changes should be incorporated into the online repository. We have to specify a remote origin not only to know where to get the files from, but also to know where to send the updates to. Performing a push is as simple as
git push origin master
One more thing: Branches
A Git repository can have several “branches”. Branches are essentially different versions of the source code stored in the repository. With this, you can have different versions of your project so that changing code in one would not affect the other.
The checkout command handles the creation, deletion, and the switching of branches. Before working on a branch of your code, you have to switch to it.
git checkout <branch_name> (switches to a branch)
git branch <new_branch_name> (creates a new branch)
git branch -d <branch_name> (deletes a local branch)
You also have to update the origin when it comes to creating and deleting branches.
git push origin <branch_name>
git push origin --delete <branch_name> (for deleted branches)
Using GUI
Instead of having to use the command line/terminal for Git, you could also opt to use programs that provide graphical user interfaces to make it easier to perform Git operations. Some of these programs, such as GitHub’s UI for Windows and Macand SourceTree are free, while others can be yours for a price. The Git website has a list of them available for anyone interested.
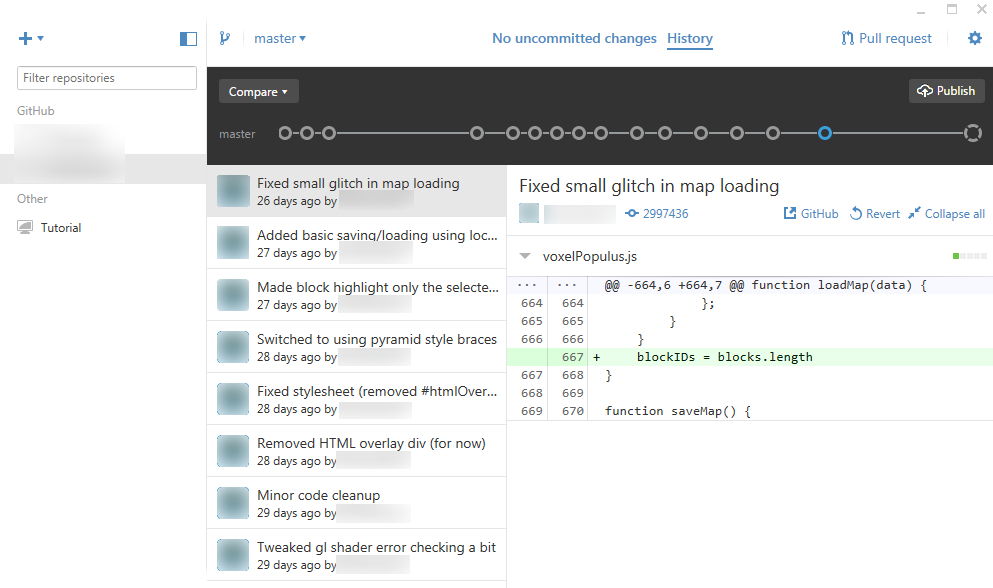
GUI programs for Git make it even easier for you to manage your code
Conclusion
While the features mentioned here might already be quite a lot to take in, they are just a few of the many features that Git has. Software development and collaboration is a tricky thing indeed, and Git, with all its complex and basic features, makes it easier for multiple people to build great products.
Erratu
Sources
Git – GUI Client: https://git-scm.com/downloads/guis: September 21, 2015
Comments